The Time Has Come...

I have been contemplating writing this post for a while now, and I can't put it off any longer. I have been blogging for a long time, si...

Showing posts with label tutorial. Show all posts

Tuesday, December 22, 2015

Guest Post by Nail Polish Pursuit: Christmas Nail Art + Video Tutorial

Please enjoy this guest post by my friend Paola from Nail Polish Pursuit!

--

Hi Pretty Polishers and Kellie Gonzo fans! I'm Paola (Pa-OH-La) aka Nail Polish Pursuit. I am SO honored that Kellie asked me come back and do another fun and cute guest post for her amazing blog! Kellie has been a wonderful mentor and inspiration to me throughout my nail polish blogging journey. Isn't she the best? I know we can all agree Kellie ROCKS! So for my guest post today, I've got 4 Christmas nail designs to show you. These are pretty simple and quick in case you need any last minute Christmas nail art ideas.

To create these designs you will need the following:

That's a lot of polish right? If you don't have all of these colors you can use what you have, or you can create only 1 of these 4 designs and paint the rest of your nails red or green for the holiday season. You also don't have to use these exact colors I used, but in case you're interested, here is the list:

Gold polish - Ziv by ZOYA
Red polish - Sooki by ZOYA
Green glitter polish - Logan by ZOYA
Nude polish - Rue by ZOYA
Pink polish - Lo by ZOYA
Blue polish - Sia by ZOYA
Silver polish - I'd Melt For You by China Glaze
Orange polish - Lady & the Vamp by China Glaze
Black polish - Never Have Too Mani Friends! by OPI (Hello Kitty Collection)
White polish - French Tip by Color Club

You're also going to need a dotting tool or toothpick, a fast drying top coat (I used HK Girl by Glisten & Glow), straight nail vinyls or tape, and a thin nail art brush.

Now let's take a look at how to create each one:

CANDY CANE
Yummy, simple, and festive!
  1. Start with a white base. I love using French Tip by Color Club because it's a one coater and super opaque!
  2. Apply a fast drying top coat and let it completely dry for about 15 minutes.
  3. Apply your nail vinyls at an angle to give the appearance of the candy cane swirls. If you don't have nail vinyls you can cut tape into different sizes.
  4. Apply 1 coat of your red nail polish and remove the vinyls or tape immediately while the red polish is still wet.
  5. Once that is dry, apply your fast drying top coat to seal the design. TIP: Apply the top coat sideways so you don't smear the design.

SANTA CLAUS
So jolly and bright!
  1. Start with your red polish and apply only a small amount to the top 1/3 of your nail closest to your cuticle.
  2. Then apply your nude polish to the middle portion of your nail. Don't worry about making the division of colors perfect because you will be covering it up.
  3. Next take your white polish and create a "french tip" line at the bottom of your nail to create Santa's beard.
  4. Once that is all dry, take your dotting tool dipped in white polish and create a line of dots side by side in between the red and nude polish to create Santa's hat.
  5. Now take your dotting tool dipped in black polish and make two small dots in the nude polish section of your nail to create Santa's eyes.
  6. Then use your thin nail art brush dipped in black polish and create a half moon shape under the eyes to create Santa's smile.
  7. Last you're going to take your dotting tool dipped in your pink polish and make two dots at each end of Santa's smile to create his jolly and bright cheeks!
  8. Once everything is dry, apply your fast drying top coat to seal the design.

CHRISTMAS TREE
This isn't a Charlie Brown Christmas Tree!
  1. Start with a white base. Apply fast drying top coat and let it fully dry for about 15 minutes.
  2. Next take two pieces of vinyl or tape and make an X across your nail to create the outlining of the tree.
  3. Then add your green nail polish in between the "X" outline. While the polish is still dry, remove the vinyls or tape.
  4. Let that completely dry and you can leave it as is or you can add ornaments to you tree like I did.
  5. Using your dotting tool dipped in gold and silver polish, make dots inside your tree to create the ornaments.
  6. I added a star on top of my tree using a tiny nail art star that came in a wheel I bought at my local beauty supply store. You can also find these on amazon.
  7. Once everything is dry, apply your fast drying top coat to seal the design.

SNOWMAN
With a carrot nose!
  1. Start with a blue base. Apply fast drying top coat and let it fully dry for about 5 minutes.
  2. Then take your white polish and create a circular mound shape at the bottom of your nail.
  3. Next take your dotting tool dipped in white polish and make dots at the top portion of your nail to create snowflakes.
  4. Now take your dotting tool again but this time dipped in black polish and make two dots at the top of the white mound to make the snowman's eyes.
  5. Last take your thin nail art brush dipped in orange polish and make a sideways triangle to create the snowman's carrot nose.
  6. Once everything is dry, apply your fast drying top coat to seal the design.

You're all done! Hope you enjoyed these cute and fun Christmas nails! Remember you don't have to make these look perfect, even the best nail artists make mistakes. Your designs will be unique and beautiful.

I also have a step by step video tutorial for these nails on my YouTube channel here:

I wish everyone a very Happy Holidays and a huge thank you to Kellie for giving me this opportunity to be a part of her awesome blog!
--

Thanks so much for guest posting again Paola! I love nail art oh so much and I fail so hard at it, so thanks for bringing some creativity to my blog! Let me know what you think! What are you wearing on your nails for the holidays? Be sure to stop by the Nail Polish Pursuit blog and subscribe if you want, or follow her on Instagram, Facebook and YouTube!

❤ Kellie

Wednesday, October 21, 2015

Guest Post by Nail Polish Pursuit: Halloween Nail Art + Video Tutorial

Please enjoy this guest post by my friend, blogger, youtuber and fellow Halloween enthusiast, Paola!

--

Hi pretty polishers and Kellie Gonzo fans! I'm Paola (Pa-OH-La) aka Nail Polish Pursuit. I am SO honored to be guest writing for my lovely friend Kellie today! She's been a wonderful mentor and inspiration to me throughout my nail polish blogging journey. Kellie and I both love all things Halloween so I felt it oh-so appropriate to create these fun and simple Halloween Nails.

You will need the following:

• white polish {I used French Tip by Color Club}
• yellow polish {I used Pippa by ZOYA}
• orange polish {I used Lady and the Vamp by China Glaze}
• purple polish {I used Looking Bootiful by China Glaze}
• green polish {I used Drink Up Witches by China Glaze}
• black polish {I used Black Pumpkin by Sally's Girl - How adorable is that little witch hat bottle top!?}
• fast drying top coat {I used HK Girl by Glisten & Glow}
• thin nail art brush {mine are from a local beauty supply store}
• medium and small dotting tool {mine are from Amazon}
• striped nail vinyls (mine are from Nailvinyls.com}

These are pretty simple for nail art beginners, but remember practice will make perfect! Here is how to create each one:

CREEPY GOOGLY EYES

1. Start with 1-2 coats of your black polish. The polish I used is opaque in one coat so it was perfect.
2. Apply a coat of fast drying top coat and let it completely dry for about 10 minutes.
3. Using your medium dotting tool dipped in white nail polish, apply three set of eyes on your nail in different directions. You can do more or less set of eyes depending on how big or small your nail is.
4. When those dots are completely dry after about 5 mins, take your small dotting tool dipped in black nail polish to make the center dot of the eye.
5. Once that is dry, apply a fast drying top coat.

CANDY CORN - this one is my favorite and SO easy!

1. Start with 1-2 coats of white nail polish. The polish I used is opaque in one coat so it was perfect.
2. Apply a coat of fast drying top coat and let it completely dry for about 10 minutes.
3. Once your nail is completely dry, use your stripe nail vinyls to create the middle color of the candy corn.
4. Apply one coat of orange polish to the middle of the nail.
5. While your polish is still wet, remove the nail vinyl stripes.
6. Apply one coat of yellow polish to the bottom of the nail. I did this one freehand and just swooped the brush across the bottom of my nail sort of like a french mani.
7. Once the polish is dry, apply a fast drying glossy top coat.

PUMPKIN

1. Start with 1-2 coats of orange polish.
2. Once that is completely dry, take your thin nail art brush dipped in black polish and create 2 triangles at the top of your nail to create the pumpkin's eyes.
3. Then create an upside down triangle underneath the two triangles in the middle to create the nose.
4. Then create a sideways half moon to create the pumpkin's smile.
5. Once that is dry, apply a fast drying glossy top coat.

WITCH STOCKINGS

1. Start with 1-2 coats of green polish.
2. Apply a coat of fast drying top coat and let it completely dry for about 10 minutes.
3. Once that is completely dry, apply your nail vinyl stripes in different positions to create the stripes of the witch's stockings.
4. Apply purple and black polish interchanging the colors with each line.
5. While the polish is still wet, remove the nail vinyls.
6. Once the polish is dry, apply a fast drying glossy top coat. TIP: Apply the top coat sideways so you don't smear any polish downward that may still be wet.

And that's it! You have created adorable Halloween Nails :) I painted the rest of my nails black but you can do more designs or paint them any other fun color you would like.

I also have a step by step video that shows this process on my YouTube channel here:


Hope you all enjoyed this tutorial and I hope you re-create your own Halloween Nails! A huge thank you to Kellie for letting me be a part of this amazing blog!

--

Thanks so much Paola! I love that these fabulous Halloween nails are so easy and fun to create! Please show some love in the comments for her because you know I can't bring you nail art like this! See ya again soon!

❤ Kellie

Wednesday, August 14, 2013

Guest Post by ChrissyAi: "Turtle Shell" Nail Art + Tutorial

What's up kids? I'm so stoked today to show you a guest post by one of my favorite makeup and nail bloggers, Christa of ChrissyAi! I was so impressed when I found this gal's blog, her nails are flawless and her makeup looks are fierce. Be sure to check out her Snorting Sprinkles series, they're so fun! She's created a beautiful nail art look for my awesome readers (you!) and has even included a video tutorial! Thank you Christa :D

-------------------------------------------------------------------------------------------

Hello lovely readers of KellieGonzo.com!
First off I'd like to thank Kellie for giving me the chance to guest post on her awesome blog, I've been a reader for a pretty long time and I adore her swatches. ♥

My mani for this guest post is a little weird since it's kind of an inside joke with a friend of mine that I decided to turn into nail art! I made a 'turtle shell' design (which to some people may not look like a turtle shell, hence the quotations haha). It's meant to resemble more of a cartoon turtle shell rather than an actual turtle shell.

Hopefully some of you see it.. or else I just look crazy!


And that's it!
I hope you enjoyed this simple silly manicure and that you try it out. You could always use different colors and ditch the 'turtle' theme!
 photo PostSignature.png

Where to find ChrissyAi

Thursday, August 25, 2011

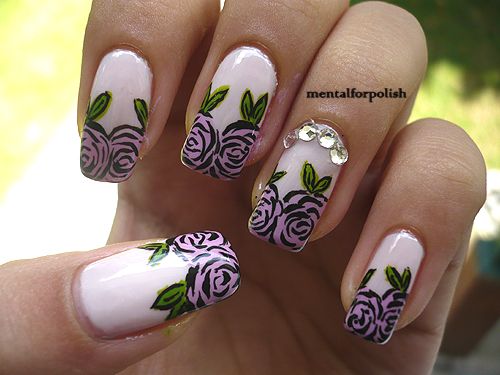
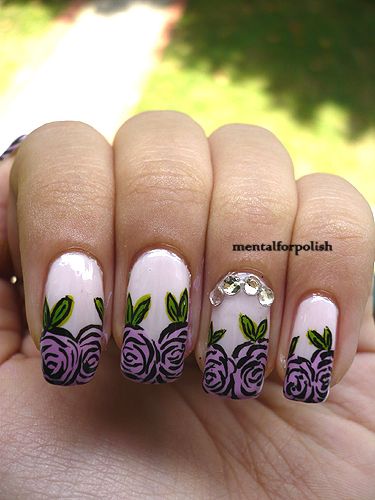
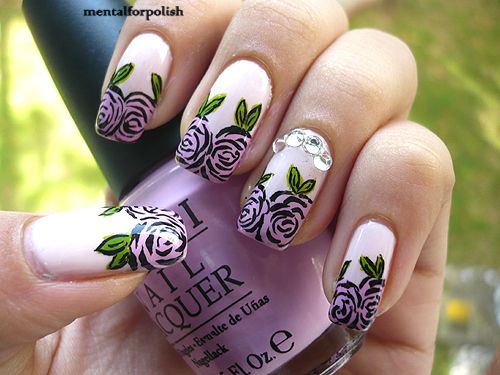
Guest Post by Mental for Polish: French Tip Roses

Please enjoy this guest post by my friend Shona from Mental for Polish!
Hello everyone! ;) This is my first guest post and I am pretty nervous and beyond ecstatic about sharing this on Also Known As...! I'd like to thank Kellie for giving me this great opportunity!

Today, I'll be doing a step-by-step tutorial for a french tip roses nail design so shall we get started? :P

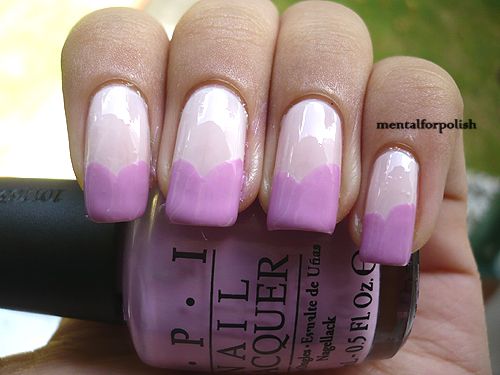
1. So the first step for every manicure is to apply your favourite base coat and 2 coats of your preferred white/nude/pink colour. I chose a pink-ish nude, OPI Step Right Up!  for the base colour. I'd suggest choosing white, nude or slight pinkish colours so that the roses will be able to stand out against the base colour.

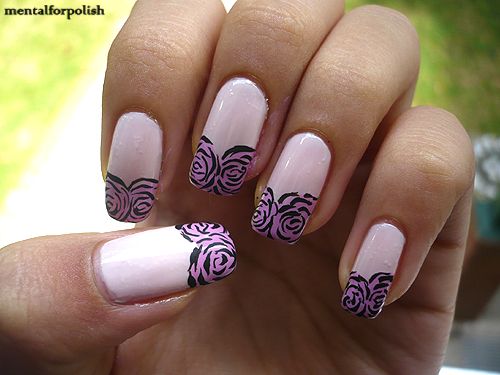
2. Use your preferred colour for your roses and paint it heart-shaped at the tips. I am using OPI Lucky Lucky Lavender. Stay away from darker colours for your roses because we are going to draw them with black acrylic paint. You don't have to worry about being perfect about this one because its all going to be covered up in the next step! :D
Photobucket

3. Take a thin detailed nail/art brush and start lining your roses! It is pretty easy actually, start with 2 curved lines not touching each other and work your way sideways! The last few strokes for the roses will be at the outline of the heart-shaped that you did in the previous step. I hope this isn't too confusing, lol.
Photobucket

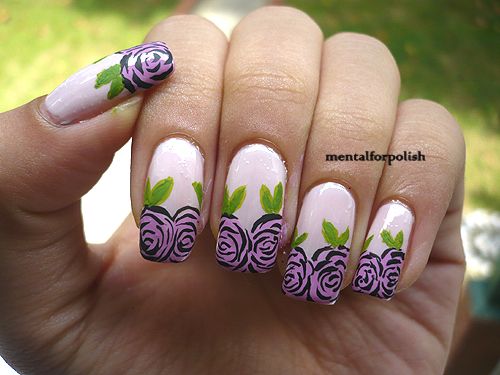
4. Next, I mixed green and yellow acrylic paint and drew 'bunny ears' for the leaves.
Photobucket

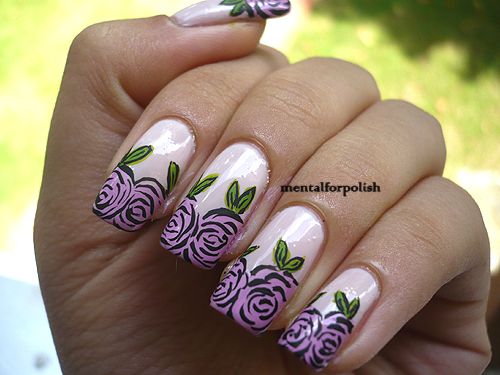
5. Outline the leaves with black acrylic paint and you're done!!
Photobucket

6. But since I couldn't resist on adding a few rhinestones, I did an accent nail with rhinestones on my ring finger for extra sparkly glam and shine :)
Photobucket

7. Add on a layer of fast drying topcoat and you're done! Make sure to do 2 layers of topcoats for your accent nail for some extra adhesive and hold for your rhinestones.
Photobucket
Photobucket

I hope this tutorial was helpful to you guys and I'd love to see your designs if you're trying this out! Once again, thank you Kellie ♥


Shona is always wowing me with her awesome nail art, it's very tasteful and elegant so I am definitely a fan. We all know how nail art can get a little, ahem, tacky sometimes ;) Thanks so much for sharing this fun and easy tutorial with my readers girl!

Related Posts Plugin for WordPress, Blogger...